Banner
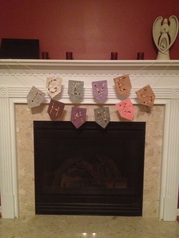
My favorite craft we've made. It's incredibly easy and the finished product looks less like a children's craft project. We discussed what it means to "give thanks" and who we should be thanking while we glued the beans.
Materials:
4.5 x 6.5 textured cardstock
White glue
Beans
Cotton Twine
Tape
Materials:
4.5 x 6.5 textured cardstock
White glue
Beans
Cotton Twine
Tape
- Decide on the message you want the banner to display. We chose "Give Thanks"
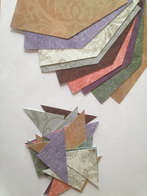
- Choose a variety of colored paper; one piece per letter.
- Cut off the lower corners so bottom end of each paper comes to a point. (Make a template and use it to mark where to cut each piece so the papers are consistent)
- Decide how you want to order the colors
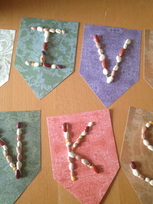
5. Write each letter on the appropriate piece of paper. I recommend doing this
in pencil.
6. Trace over each letter with a thick layer of glue.
7. Place beans along glue to make the letter. Let dry. (This is the best part for
kids to help with.)
8. Measure twine based on where the banner will hang. Allow for the amount of
draping you desire. I measured a second piece of twine with a little more
draping so I could have 2 lines to my banner.
9. Place each letter on the twine and secure the twine to the backside using strong tape.
10. Hang banner and let it be a reminder to give thanks in all situations.
Education tip: Take time to identify letters, review sounds the letters make, learn the chosen word(s)
Placemats
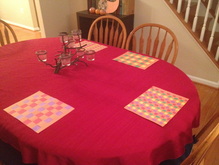
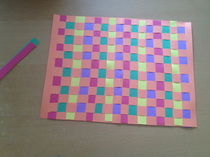
Placemats add festive decoration to the table and provide opportunity to talk about how we celebrate thanksgiving and, more importantly, why. If all the materials are prepped prior to beginning, this can be a relaxing project with everyone sitting around the table weaving and talking.
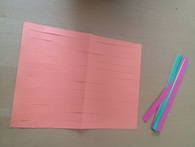
- Fold a piece of construction paper in half (one per person) and cut slits stopping 1/2 inch from edge. I cut slits close together for the adults and wider slits for the kids.
- Cut strips of various colored construction paper from the shorter side of the paper. Again, I cut wider strips for the kids.

3. Choose strips of paper and weave through the slits going over,
under for the first strip and then under, over for the next strip.
Slide each strip over as close to the previous strip as possible,
before adding a new strip. Continue to alternate until you have
filled the placemat.
Education tip: Discuss patterns: color patterns you could make; over/under
under for the first strip and then under, over for the next strip.
Slide each strip over as close to the previous strip as possible,
before adding a new strip. Continue to alternate until you have
filled the placemat.
Education tip: Discuss patterns: color patterns you could make; over/under
Cornucopia- filled with thankfulness
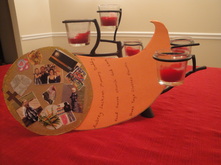
This traditional symbol for thanksgiving isn't filled with fruits and vegetables, but rather things we are thankful for. When your family finishes this craft, you will have a true "horn of plenty" filled with all the goodness in your life
- Cut a cornucopia shape out of cardboard. (We cut the circle and the horn separately and then glued them together)
- Cover the horn with orange construction paper and decorate the edges of the circle with glitter.
- Choose photos and magazine cutouts to show people/things you are thankful for. Glue them in the round "opening" of the cornucopia.
- Write the word of each person/thing you are thankful for on the horn. We wrote ours in lines curving across the horn to look like bands.
- You can complete this craft in one sitting or add one everyday leading up to Thanksgiving. We do this craft as an ongoing project on thankfulness and add to it each day (hence the unfinished product in the picture)


 RSS Feed